

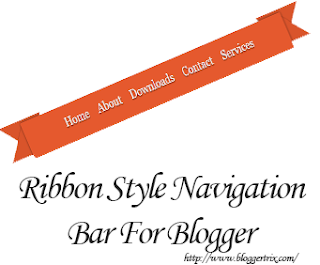
Here’s one cool CSS3 widget I discovered which is created by the guys at Bloggertrix , which is a modern ribbon style navigation bar for your Blogger site.
1. Log to your Blogger Dashboard, then click on the drop down menu.
2. Select Template.
3. Click EDIT HTML Button > Proceed Button
4. Look for this : ]]></b:skin>
5. Copy and paste the code below before ]]></b:skin> tag:
float: left;

margin: 1em 0.8em;

}

#navigation2 li a {

text-shadow: 0 2px 1px rgba(0,0,0,0.5);

display: block;

text-decoration: none;

color: #f0f0f0;

font-size: 1.6em;

margin: 0;

line-height: 28px;

}

#navigation2 li.active a:hover,

#navigation2 li a:hover {

margin-top: 2px;

}
#navigation2 li.active {

font-style: italic;

}

#navigation2 li.active a {

}

.rectangle {

background: #e5592e;

height: 62px;

position: relative;

-moz-box-shadow: 0px 0px 4px rgba(0,0,0,0.55);

-webkit-box-shadow: 0px 0px 4px rgba(0,0,0,0.55);

box-shadow: 0px 0px 4px rgba(0,0,0,0.55);
-webkit-border-radius: 2px;

-moz-border-radius: 2px;

border-radius: 2px;
z-index: 500; /* the stack order: foreground */

margin: 3em 0;

}

.l-triangle-top {

border-color: #d9542b transparent transparent;

border-style:solid;

border-width:50px;

height:0px;

width:0px;

position: relative;

float: left;

top: -5px;

left: -50px;

}
.l-triangle-bottom {

border-color: transparent transparent #d9542b;

border-style:solid;

border-width:50px;

height:0px;

width:0px;

position: relative;

float: left;

top: -45px;

left: -150px;

}

.r-triangle-top {

border-color: #d9542b transparent transparent;

border-style:solid;

border-width:50px;

height:0px;

width:0px;

position: relative;

float: right;

right: -45px;

top: -107px;

}

.r-triangle-bottom {

border-color: transparent transparent #d9542b;

border-style:solid;

border-width:50px;

height:0px;

width:0px;

position: relative;

float: right;

top: -149px;

right: -145px;

}
Note: Before editing your template, be sure to make a back up of it first.
6. Go to Layout.
7. Click Add Gadget. Select HTML/Javascript.
8. Paste this code
<div id="navigation_container">
<!-- the left side of the fork effect -->

<div></div>

<div></div>
<!-- the ribbon body -->
<div>
<!-- the navigation links -->
<ul id="navigation2">

<li><a href="#"> Home</a></li>

<li><a href="#"> About</a></li>

<li><a href="#"> Downloads</a></li>

<li><a href="#"> Contact</a></li>

<li><a href="http://www.bloggertrix.com/"> Services</a></li>

</ul>
Note: Replace # with your own links.
9. Hit Save.
Lorem ipsum dolor sit amet, consectetur adipisicing elit, sed do eiusmod tempor incididunt ut labore et dolore magna aliqua. Ut enim ad minim veniam, quis nostrud exercitation.


0 comments:
Post a Comment