Announcement:

This is a Testing Annocement. I don't have Much to Say. This is a Place for a Short Product Annocement

Latest Updates

View More Articles

Tuesday 11 June 2013

Add a Facebook Invite Friends Link to your Blogger Site

Over at 9Lessons I read a very helpful tutorial to add an "Invite your Facebook Friends" link to a website. I was able to modify this in order to add to a gadget which now appears in the sidebar on all pages of Blogger Buster (beneath the Facebook Like box).

If you click on this link, a box will appear on the page enabling you to invite chosen friends from your Facebook profile to visit Blogger Buster.

In this simple tutorial I'll explain how you can add this functionality to your own Blogger powered blog.

Create a Bit.ly URL for your blog

The first thing you'll need to do is create a short bit.ly url for your blog. This will enable us to circumvent the requirement for a secure base URL (beginning with https which we can't natively use with Blogger).

Make a note of this short bit.ly URL as you will need it when creating your app on Facebook.

Create your Facebook App

Now you'll need to create a Facebook Application as you'll need an appID to use in your code. Visit the Apps page on Facebook Developers to do this.

Name your application and fill in the first set of details as follows: 
  • Display Name - The name of your site 
  • Namespace - yournamespace (this will feature in the URL for your app. eg: http://apps.facebook.com/bloggerbuster)
  • Contact email - your email address 
  • App Domains - The URL(s) of the blog(s) you will be using this app for (eg: http://yourblog.blogspot.com) 
Next, click on "Select how your app integrates with Facebook" and fill in details as follows:

  • Website with Facebook Login - Your blog's URL (eg: http://yourblog.blogspot.com) 
  • Canvas URL - Here you'll need to enter the bit.ly url you generated for your site, adding a question mark at the end. For example, http://bit.ly/blgrbstr? 
  • Secure Canvas URL - Enter your blog's bit.ly URL beginning with https (eg: https://bit.ly/blgrbstr?) 

If you like, you can add an icon and thumbnail for your application at the top of the page; these will appear when readers use your app. Then save your changes.
Once you've done this, be sure to make a note of your App ID which will be shown at the top of the page as you'll need to add this to the code to be pasted in your site.

Add a custom gadget to your site

Finally, go to the Layout section of your Blogger dashboard and choose to add (or edit) an HTML/JavaScript gadget.
Paste the following code into your gadget, replacing the values highlighted in red and blue:

<script src="http://connect.facebook.net/en_US/all.js"></script>
<script>
FB.init({
appId:'your-app-id',
cookie:true,
status:true,
xfbml:true
});
function FacebookInviteFriends()
{
FB.ui({
method: 'apprequests',
message: 'Your Message Here'
});
}
</script>
<div id="fb-root"></div>
<span class="invite-friends-link"><a href='#' onclick="FacebookInviteFriends();">
Invite friends link text
</a></span>
<script type='text/javascript'>
if (top.location!= self.location)
{
top.location = self.location
}
</script>
And save the changes.

This will create a basic text link which your blog visitors can click to bring up a Facebook dialogue box in which their friends can be invited to visit your site.

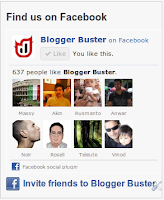
Here's a demo of how the "Invite Facebook Friends" link works:

Invite friends to Blogger Buster

For those who may be reading this post in their feed reader. here's a screenshot of the Facebook pop-up screen:


If you would like to style the link to look like the one which appears above and in the Blogger Buster sidebar, go toTemplate>Customize in your Blogger dashboard, scroll down to the Advanced section and add the following to your Custom CSS (or modify to suit your requirements):
.invite-friends-link a {
background: url(https://blogger.googleusercontent.com/img/b/R29vZ2xl/AVvXsEhwnek48wy0PeJGu76BQFGLZzvV_eFBI76Yw1M5oHI6JJxkG6patIg890a_bdyODpunXCKRGf60LxSDDHOTIkW2nHD_f7bIo4cra_8ZCNK2uUCarVwxLbYpiYIU4lkXWS5Xc4erxIcPxMkH/s1600/facebook.png) left no-repeat;
padding-left: 30px;
line-height: 30px;
font-size: 16px;
font-weight: bold;
color: #3b5998;
display: block;
}
That's all there is to it!

Final thoughts

Admittedly it did take a while for me to figure out how to get my own app working properly. The biggest problem I had was finding a way to use a secure base URL as Blogger does not support https requests. Thankfully I discovered that bit.ly enables us to use a secure shortened URL, though you could alternatively use the free service provided by Social Server.

I hope you have found this tutorial to be useful in creating your own "Invite Facebook Friends" link for your Blogger powered site. Please feel free to leave your comments and suggestions below.


Add Stylized Captions to Images in your Blog Posts Using CSS

In recent weeks, you may have noticed the captions I add to images in my blog posts. Where I am showcasing the work of another author, I prefer to add a caption explaining where this image has come from, whether this be Flickr or a screenshot of another blog/website.
I've tried a few different methods to display captions beneath images, and the best solution I have found so far is to use CSS. This allows me to align images (and their relevant captions) to the left, right or center of the post with ease.
So in this post, I will explain how I achieve stylized captions beneath my images in Blogger posts using only CSS and HTML tags

Some examples of images with captions

Left Image
Right Image
Here are some images aligned to the left, right and center with their relevant captions beneath. The caption appears below the image with a border beneath which separates it from the main body of the post.
This is achieved by wrapping both the images and the captions in <span> tags which have a "class" depending on their alignment (left, right or center aligned).
Center aligned image (Photo by Montrasio International)

How these captions work

This image demonstrates the code I use to make the captions appear beneath each image:
In the body of my posts, the code for the images and captions will appear like this:
<span class="left-caption">

<img src="http://url-of-image.com/image.jpg" />

<p>Caption of this image</p>

</span>
This example would produce an image and caption which is aligned to the left of the text in my post.
To align an image to the right, I would replace "left-caption" with "right-caption", or to center the image I would use "center-caption".

The CSS code used to produce these images and captions

If you would like to use captions which are styled like those I use in my posts, you will need to use the following styling code:
.left-caption { float: left; margin: 0 1.5em 1em 0; padding: 0.5em; text-align: center; }
.right-caption { float: right; margin: 0 0 1em 1.5em; padding: 0.5em; text-align: center; }
.center-caption { margin: 0 0 1em 0; padding: 0; text-align: center; }
.left-caption img, .right-caption img, .center-caption img { margin: 0 auto; display: block; }
.left-caption p, .right-caption p, .center-caption p { background: #eee; margin: 0; line-height: 1.6em; padding: 0.5em; border-bottom: 1px solid #ccc; border-top: 1px solid #ccc; font-size: 0.9em; color: #333; }
Copy this entire section of code and paste this just before the closing </b:skin> tag in your blog's template code.

How to use these captions in your Blogger posts

Once you have added this style code to your blog's template, you can display captions beneath the images in your posts.
To achieve this, you will need to wrap both your image and your caption in span tags according to the alignment you prefer. Here are the three different formats you could use:
To align these to the left
<span class="left-caption">

<img src="http://image-host.com/yourimage.jpg" />

<p>Your Caption Here</p>

</span>
To align these to the right:
<span class="right-caption">

<img src="http://image-host.com/yourimage.jpg" />

<p>Your Caption Here</p>

</span>
To align these to the center of the page:
<span class="center-caption">

<img src="http://image-host.com/yourimage.jpg" />

<p>Your Caption Here</p>
</span>
Note that the captions are also wrapped in paragraph tags, like this:
<p>Your Caption Here</p>
This ensures the caption is properly styled, as the CSS code contains the styles for paragraphs which appear within this span class.
If you upload your image using Blogger's image upload function, you must make sure that you choose "None" in the layout choices.
It may be easier for you to use the HTML editor to create posts with image captions as this will allow you to see all of the code you are using.

Other methods of adding captions to your posts

As I explained at the beginning of this post, there are many different methods you could use to display captions beneath your images. The method I explained here is the one which works best for me, though you may prefer to use a different technique.
Here are some links to other articles which offer alternative methods to display captions beneath your post images:
  • JavaScript Image Captions from 1976 Design

    This method automatically inserts a caption based on the title of the image.
  • Captions for Images in Blog Posts by Blogger Tips and Tricks

    This is a much simpler method, using only HTML code in the body of the post.
  • Image Captions with CSS and JavaScript by Ask The CSS Guy

    Similar to 1976 Design's post, this article uses a combination of styling code and scripting to add a partially transparent caption over the bottom section of the image.
I hope this tutorial has been useful in explaining how you could add captions to your post images in Blogger. If you have any questions or would like to suggest further uses for this, feel free to leave your comments and suggestions below.

Find free icons for your blog with the Iconlet search engine

Iconlet.com is a great new search service to help you find free icons you can use in your blog posts and templates. This service runs like a simple search service, allowing you to input search terms for the icons you need and returning results in image format for you to download to your computer. There are loads of "Web 2.0" style icons to use, and even full icon sets (such as Home/About/Contact icons of a matching theme).
Don't be put off ny the simple layout of the front page: this is truly a very useful design tool, and can also provide you with great inspiration for your blog template design. Let me know what you think of Iconlet by leaving your comments below.

The Stylish Way to Show Off Your Feed Count! IN blogger

Let's face it, while Feedburner's FeedCount widget is an easy way to display your blog's feed count, it does look a little boring! Luckily there is another way for Blogger users to display their feed count, which will enable you to have almost complete control of the way this is displayed! This is the method I use to display Blogger Buster's feed count which you can see in the bottom of the sidebar.
This method is a little more complicated to install than the Feedburner widget: you will need to edit and host your own PHP files and also style the widget to your liking. But through this tutorial, I will take you through the process step by step. You'll soon be on your way to creating a unique feed count display for your own Blogger powered blog!

A Bit About This Widget

I've been looking for a working method of styling the subscriber count in Blogger for a long time. Wordpress users have the advantage of installing a PHP based plugin to accomplish this with ease, but as many of you will realize, such support is not available for us to use in Blogger templates.
After endless searching, I finally came across the Conflagration plugin which was written by Garret Albright. While this was essentially written for Wordpress blogs, this script has one advantage which enables it to be used in Blogger powered blogs too: the ability to call the subscriber count using JavaScript!
By stripping the contents of this plugin to two essential files, I was able to parse and display my own subscriber count as a simple textual number, then style this nicely with CSS.

Important Considerations (you must read this before trying to install your widget!)

This "hack" is more complicated than other tutorials I have written here before, though I will try to simplify things as much as possible!
The most important thing to consider before installing this hack is whether you have an external hosting account where you can upload and access PHP files. I imagine that many of you will not already have such hosting available to you, though luckily I have been able to find a few decent free file hosts which do host (and allow access to) PHP files:
All of these free hosts offer support for PHP; you will be required to register your details in order to access this free webspace and may need to wait for verification of your account before you are able to upload the required files for this hack. These free hosts do state that this free hosting is ad-supported, though this is nothing you need to worry about as it won't affect how the script displays your feed count!
Once you have access to a file host which offers support for PHP, you're ready to customize your own Subscriber Count widget.

How to Create Your Own Subscriber Count Widget

In this section, I'll explain what is necessary to display your feed count, and afterwards will offer some examples of how you can customize this.
There are 5 main steps to creating your own Feedburner Subscriber Count widget:
  1. Activate Remote Access to your Feedburner Traffic Data

    By default, remote access to your Feedburner traffic data is disabled. You will need to activate remote access to create and display your own feed count widget.

    To do this, log in to your Feedburner dashboard and choose the name of the feed you wish to access. Then click on the Publicize tab, and look for the Awareness API option in the left sidebar menu.

    Finally, click on the "Activate" button to allow external access to your traffic data.
  2. Download the required files for your widget

    Next you will need to download the files you need to make this widget work:

    DownloadDownload Feed-Count-Display Files

    Unzip the files to a location on your computer, maintaining the same file structure of these files as you will soon need to upload these to your host.
  3. Edit the Config.php File to include your personal feed data

    This is the tricky part. You will need to edit the Comfig.php file to include your personal Feedburner ID number.

    The easiest way to get this number is to log in to your Feedburner dashboard and click on the name of the feed you are interested in. Your ID number is the number at the end of the URL in your browser address bar:


    Copy this number from your address bar. Then open Config.php using your favorite text editor (eg: Notepad or Notepad++).

    In this file, you will need to locate the following line:
    FeedID1:1268073
    Replace this number with your own Feedburner ID number and save the file.
  4. Upload all of the files to your hosting provider

    You now need to upload all of the files contained in the Feed-Count-Display folder to your hosting provider. Use FTP to upload the folder wherever possible as this ensures the file structure is maintained. If you need to upload each file individually, you must make sure you create a folder named "Data" (with a capital D).

    Make sure that the "Data" folder is writable by the server. This means that you should set the folder permissions to the numeric value 755. Or in other words:
    Owner permissions: read, write, execute
    
    Group permissions: read, execute
    
    Public permissions: read, execute
    This means that your subscriber count can be written to the folder each day, ensuring that this value is kept up to date.
Once you have completed all four steps, you can check that the scripts are working and display the true value of your subscriber count.
To do this, visit the "js.php" script where it is hosted on your server, by entering the URL of this file in your address bar, like this (change the section in red to match the location of your files):
http://www.yourhost.com/yourfiles/feed-count-display/js.php
This should result in a simple page featuring the current number of subscribers to your blog which will look something like this:
document.write("123");
To make this number appear in your blog, you can use a simple JavaScript in the following format:
This blog currently has
<script type="text/javascript" src="http://www.yourhost.com/yourfiles/feed-count-display/js.php"></script>
 subscribers!
If you add this simple JavaScript to your sidebar, for example, the result will appear something like this:
This blog currently has subscribers!
At this point, you know you can display an accurate count of your subscribers as simple text. And because we can display this as text, we can use CSS to make it stylish!

Make your subscriber count widget stylish!

Using CSS offers endless possibilities for styling your subscriber count!
Here are a couple of examples you could use, along with their corresponding code (dont't forget to change the URL of the script to that of your own host!
This blog has
123
subscribers
123
Happy
subscribers!
Blogsolid showcased some great examples of subscriber count widgets which you could take a look at if you're seeking inspiration.

Licensing and Credits

The scripts used to create this widget were originally written by Garrett Albright of RayGunRobot, while the YAML parser was written by (spyc.php) was created by Chris Wansthrath and is under the MIT License.
In keeping with the licensing of Garrett's original post, the files offered here are free and open source, so you may use and distribute these as you like.

Final Thoughts...

As I mentioned earlier, this is probably the most complicated (and least "user-friendly") tutorial I have posted here at Blogger Buster. I honestly wish there were a simpler method for styling the subscriber count in Blogger powered blogs, but unfortunately this is the only working solution I have found.
So if anyone knows of a simpler method which would work in Blogger please do let me know about this!
In the future, I may post a showcase of Blogger powered subscriber count widgets, so if you have designed a great widget to display your subscriber count please email me your URL or leave a comment below.

Top 12 keyboard shortcuts for bloggers


I often use keyboard shortcuts while blogging, as these can save much time and enable you to perform certain tasks more easily. Here is a list of the top 12 keyboard shortcuts I use while blogging, which can be really useful when editing posts and templates.
These keyboard shortcuts work in all major browsers, including Internet Explorer, Firefox and Opera.
As Mac OSX uses the CMD key rather than the regular CTRL key, all references in the table below refer toCTRL/CMD, so that users of either type of computer are able to understand these shortcuts.
FunctionWhat it doesExample of usage
CTRL/CMD+BBold TextWhen editing your blog posts, highlight the section you want to appear in bold test and key CTRL+B (or CMD+B)
CTRL/CMD+IItalic TextFor when editing blog posts. Highlight the text you would like italicised and key CTRL+I (or CMD+I)
CTRL/CMD+ASelect allSelects all of the content on a page. If you put your cursor in a container (eg: when editing a blog post or your template), this will select all of the content in the container.
CTRL/CMD+CCopyCopied the highlighted selection to your clipboard. Useful for when copying code in your template, or using quotations in your blog posts.
CTRL/CMD+VPastePastes the content of your clipboard into the area you are working on. Often used with the "copy" function (above)
CTRL/CMD+XCutCuts the selection from your working area, and copies to the clipboard for later use rather than deleting it. Useful for when you need to move a selection of code or text from one area to another.
CTRL/CMD+FFindPresents a test input box which you can use to find specified text in your current page. This is very helpful when editing your blog template, for example when finding a specific line of code.
CTRL/CMD+NNew browser windowThis brings up a new browser window, ideal for when you need to view two web pages in the same session.
CTRL/CMD+TNew Tab (Not available in IE)Brings up a new browser tab.
HOMEGo straight to the top of the pageIdeal for when you need to go back to the top of a page quickly
ENDGo straight to the bottom of a page, or to the end of a line if you are editing your posts/templateA fast way to reach the bottom of a post when editing, for example. When editing your posts or template, this key will quickly move your cursor to the end of the line you are editing.
CTRL+HView browser historyBring up a sidebar section in your browser to display recently viewed pages.
I hope you find these keyboard shortcuts as useful as I do while blogging! Please feel free to leave your comments below.


How to add a music player in Blogspot


In preparation for explaining how to podcast with Blogger, this tutorial explains how to easily add an HTML5 mp3/audio player to your blog posts or layout. No JavaScript, Flash or plugins are required, and with a fallback for older browsers which don't support the player.

I've even created a simple form to generate basic tags for you! Adding music to your Blogspot site has never been so easy!
The <audio> tag is a new feature of HTML5 which we can use to natively embed audio playback in our sites.

It is supported in Internet Explorer 9, Firefox, Opera, Chrome, and Safari, and can be set to play the linked audio file automatically (autoplay) or loop if required.

Here's a basic example using the <audio> element:


The audio player above is produced using the following HTML code:
<audio controls
<source src="url-of-audio-file" /> 
If you cannot see the audio controls, your browser does not support the audio element 
</audio>
In the example above, all code related to the audio player is wrapped in <audio> tags. By including controls in the audio element, a simple player is displayed, enabling the user to begin playback when (or if) they want, and to adjust the volume.

Any text between the audio tags (which is not enclosed in the <source> tags) is displayed in browsers which do not support the audio element (IE8 and below).

If you would like the audio to begin playback as soon as it is ready, you can enable autoplay as in the following example:
<audio controls autoplay>
<source src="url-of-audio-file" />
If you cannot see the audio controls, your browser does not support the audio element
</audio>

By retaining the controls attribute, you give visitors the option to stop or resume audio playback if they choose.

To loop audio (specify that the audio will start over again, every time it is finished), include the loop element in the <audio> tag, like this:
<audio controls loop>
<source src="url-of-audio-file" />
If you cannot see the audio controls, your browser does not support the audio element
</audio>

Hosting files for your audio player

Blogger does not allow us to upload or host audio files, so in order to add an audio player you will need to find a host for your mp3/ogg files.

While Blogger Help suggests hosting providers which offer free and premium packages, I anticipate most of you would prefer a simple free solution, so here are a few suggestions:
Once you have uploaded your audio files, make a note of the direct link to the file which you'll need to add in the code for your audio player.

Official Facebook Recommendations Bar Widget for Blogger / Blogspot


Official Facebook Recommendations Bar Widget for Blogger / Blogspot
Facebook Introduced their brand new social social plugin called Facebook Recommendations Bar. It is Beta Plugins.
In this tutorial, we go to learn how to install Facebook Recommendations Bar in Blogger Blogs. This widget is more helpful to drive traffic from Facebook with and instant likes and related posts.

PREVIEW

Official Facebook Recommendations Bar Widget Preview
OR
You can take a look at Right Bottom of this Page and see it’s action in Live!

HOW TO INSTALL THE OFFICIAL FACEBOOK RECOMMENDATIONS BAR WIDGET?

In order to work the Facebook Recommendations Bar every blog should must have the Facebook Open Graphs meta tags.
I found the simplest and Working Facebook Open Graphs tags on GitHub gist. Thanks to pathawks.!
Add the Following code after <head> tag.
<!-- Begin Open Graph metadata -->
<b:if cond='data:blog.pageType == &quot;item&quot;'>
	<meta content='article' property='og:type'/>
	<meta expr:content='data:blog.title' property='og:site_name'/>
	<meta expr:content='data:blog.pageName' property='og:title'/>
	<b:if cond='data:blog.postImageThumbnailUrl'>
		<meta expr:content='data:blog.postImageThumbnailUrl' property='og:image'/>
	</b:if>
<b:else/>
	<meta expr:content='data:blog.title' property='og:title'/>
	<meta content='website' property='og:type'/>
</b:if>

<meta expr:content='&quot;en_US&quot;' property='og:locale'/>
<meta expr:content='data:blog.canonicalUrl' property='og:url'/>
<!-- End Open Graph metadata -->
  1. First Go to Facebook Recommendations Bar Official Page.
  2. Directly click the Get Code Button.
    Official Facebook Recommendations Bar Widget for Blogger / Blogspot step one
  3. Click on Create a new app Link
    Official Facebook Recommendations Bar Widget for Blogger / Blogspot step two
  4. Enter the App Name with your Blog Title and App URL with your Blog URL, like as below and Click Continue button.
    Official Facebook Recommendations Bar Widget for Blogger / Blogspot step three
  5. Enter Captcha Code Correctly and Click Submit button
    Official Facebook Recommendations Bar Widget for Blogger / Blogspot step four
  6. Then Click the Get Code Button once again.
    Official Facebook Recommendations Bar Widget for Blogger / Blogspot step five
  7. Copy the First JavaScript SDK code (First Box Code) and Encode the Code using This Tool
    Official Facebook Recommendations Bar Widget for Blogger / Blogspot step six
  8. Login to New Blogger Dashboard > Choose your Blog and Click the More Options Dropdown
  9. Select the Template > Click on Edit HTML > Proceed
  10. Check/Tick the Expand Template Widgets checkbox
  11. Search for <body> tag and place the Copied code After <body> tag.
  12. Facebook Recommendations Bar Customizations:
    You can customize the Facebook Recommendations Bar settings
    Settings


    Search for <data:post.body/> tag and place the following code after the<data:post.body/> tag
    <b:if cond='data:blog.pageType == &quot;item&quot;'><div class="fb-recommendations-bar" data-trigger="onvisible" expr:data-href="data:post.url" data-read-time="30" data-action="like" data-side="right" expr:data-site="data:blog.homepageUrl" data-num-recommendations="2"></div></b:if>
  13. Save the Template, Enjoy :)
Please dorp your comments and share this post.

Copyright @ 2013 All Tutorials and Information . Designed by Templateism | Love for The Globe Press